


I recently got the Geeetech E180 3D printer which suffered form black screen. It worked fine through USB so I decided to see if it can be fixed.
Geeetech A30 & E180 printers share the same colour screen. It also has a touchscreen. Driving this screen requires a certain amount of computing power. To ensure a good peformance of a 3D printer Geeetech decided to drive the screen from a separate MCU. Those printers have dual STM32F103VET6 MCU – one on the main board and one on the screen PCB. From time to time software update of screen MCU fails and render the device ususable. When turning the printer on, screen remains black and you don’t hear a characteristic beep. Actually MCU still works – trying to update the screen software does “something”, but the screen is black no matter what you do. The only way to fix it is to reprogram whole MCU flash memory.
To do that you’ll need a ST-LINK V2 programmer dedicated to STM8 & STM32 MCUs:

In case of STM32 based boards Geeetech was kind enough to expose programmer pins on the PCB (opposite to 2560 boards where you need to solder additional wires to program the MCU).
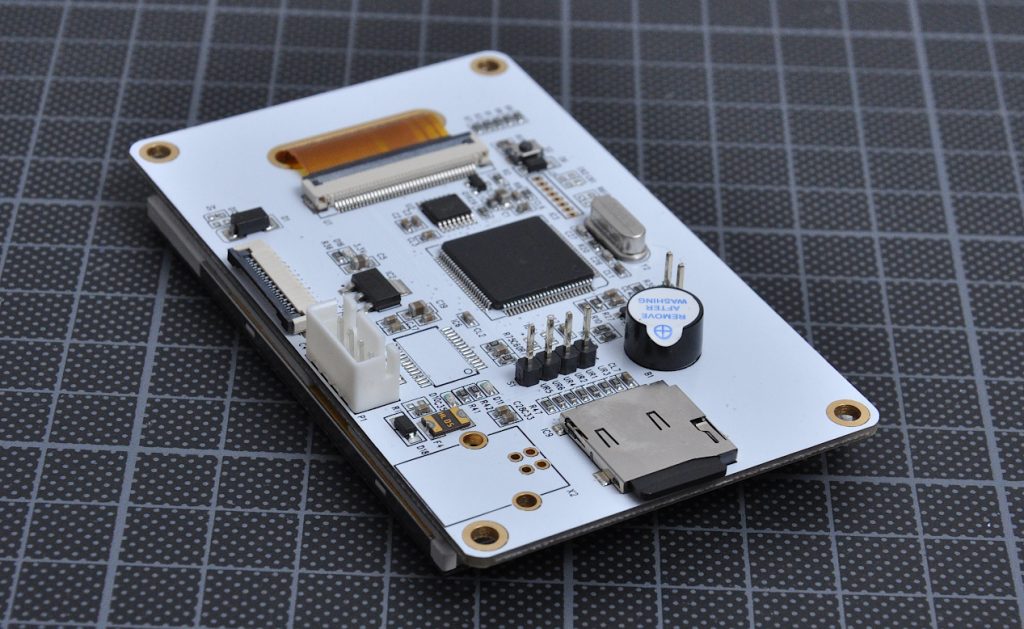
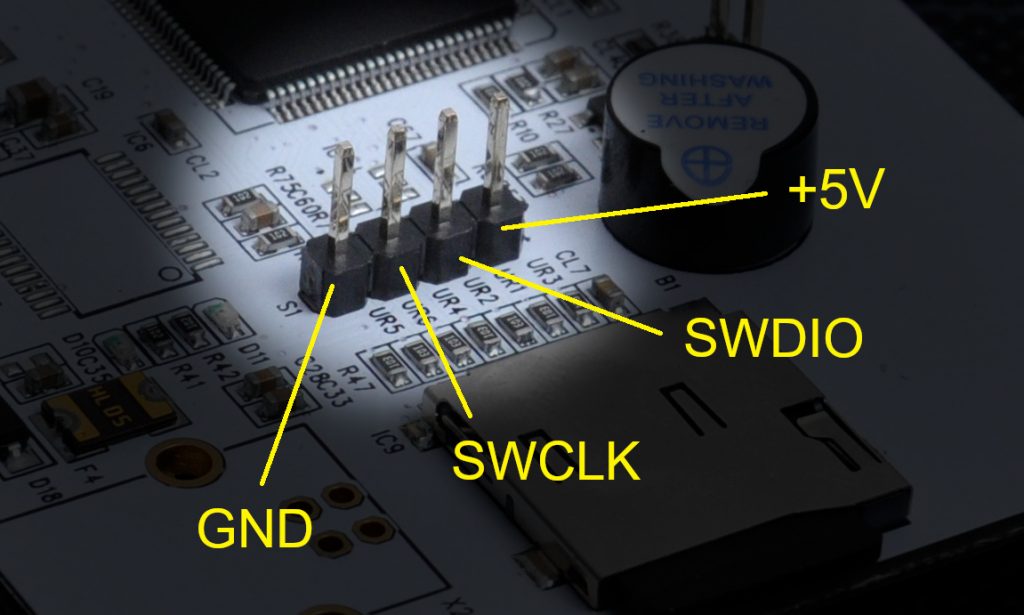
Programming pins are located next to micro SD Card slot. You’ll have to connect them to corresponsing pins on ST-LINK. I’m not showing you the exact connection, as there are different versions of ST-LINK available with different pinouts.
Prior to connecting the programmer disconnect the printer from the POWER. Connecting power from the PSU and the programmer at the same time may damage your computer!
The most important pins are GND and +5V. Be carefull not to mistake them as wrong connection of those pins will result in burnt board. Remaining two signals are SWCLK & SWDIO. This is the pinout:
You’ll also need ST-LINK software, which you should get directly from http://st.com. Download, install the software & the drivers.
Last item you need is binary file to upload to your MCU. Since I had a working E180 printer I downloaded flash contents to binary file and used it to flash a broken screen. You can download it from here: http://maniana.net/files/E180_screen.bin
Now you should have:
- ST-LINK V2 connected to the screen board
- Binary file downloaded
- ST software installed
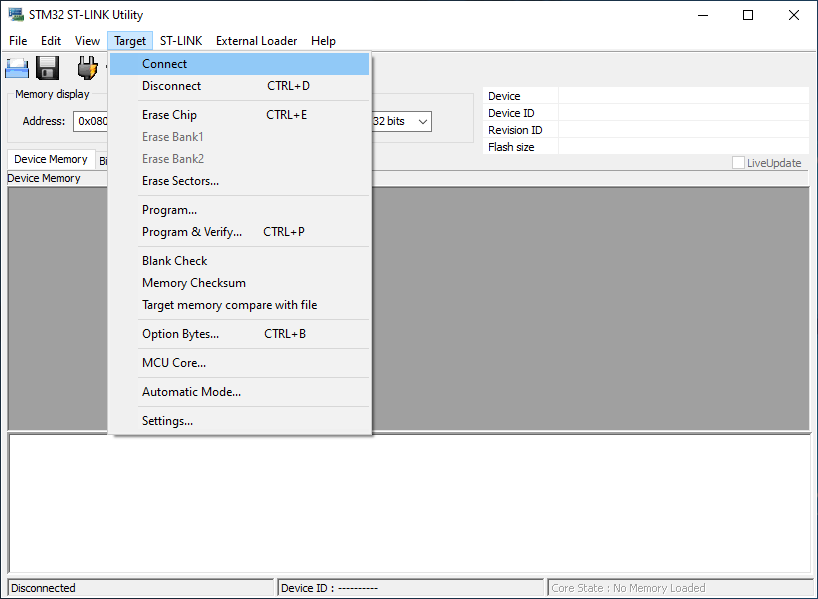
Time to connect everything and flash your board. Connect ST-LINK to USB. Run ST programming software. Connect to the board.
If everything went OK you should see flash contents:
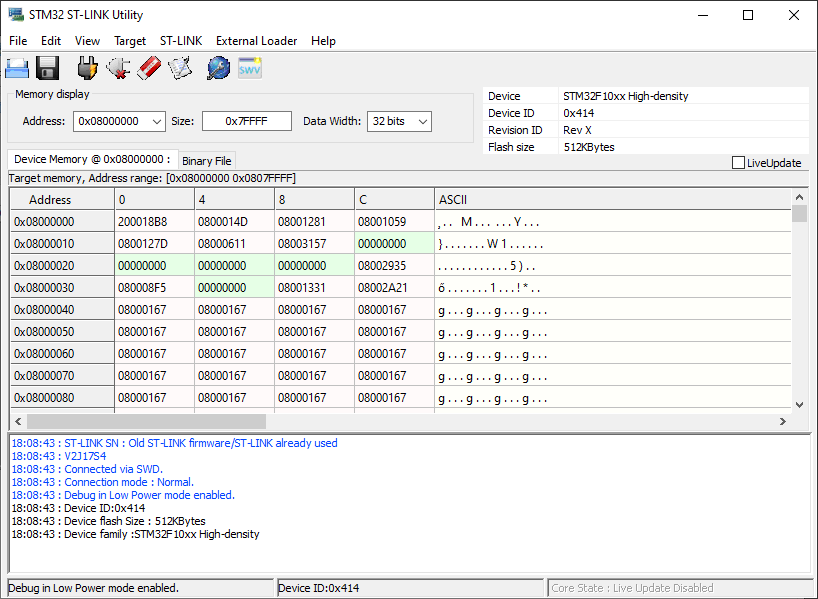
Flash size on STM32F103VET6 is 512kB. You should rewrite whole flash, so size should be set to 0x0007FFFF. Select Program & Verify:

My recommnedation is that you do all 3 steps – chip erase, program & verify.
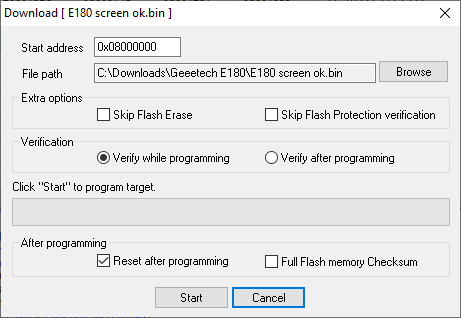
Click Start. When programming is finished board will reset. You should a characteristic beep and the screen should come up. Depending on the images version on the SD card you might need to download updated images from Geeetech site.
Happy 3D printing !!!